Web Scanning
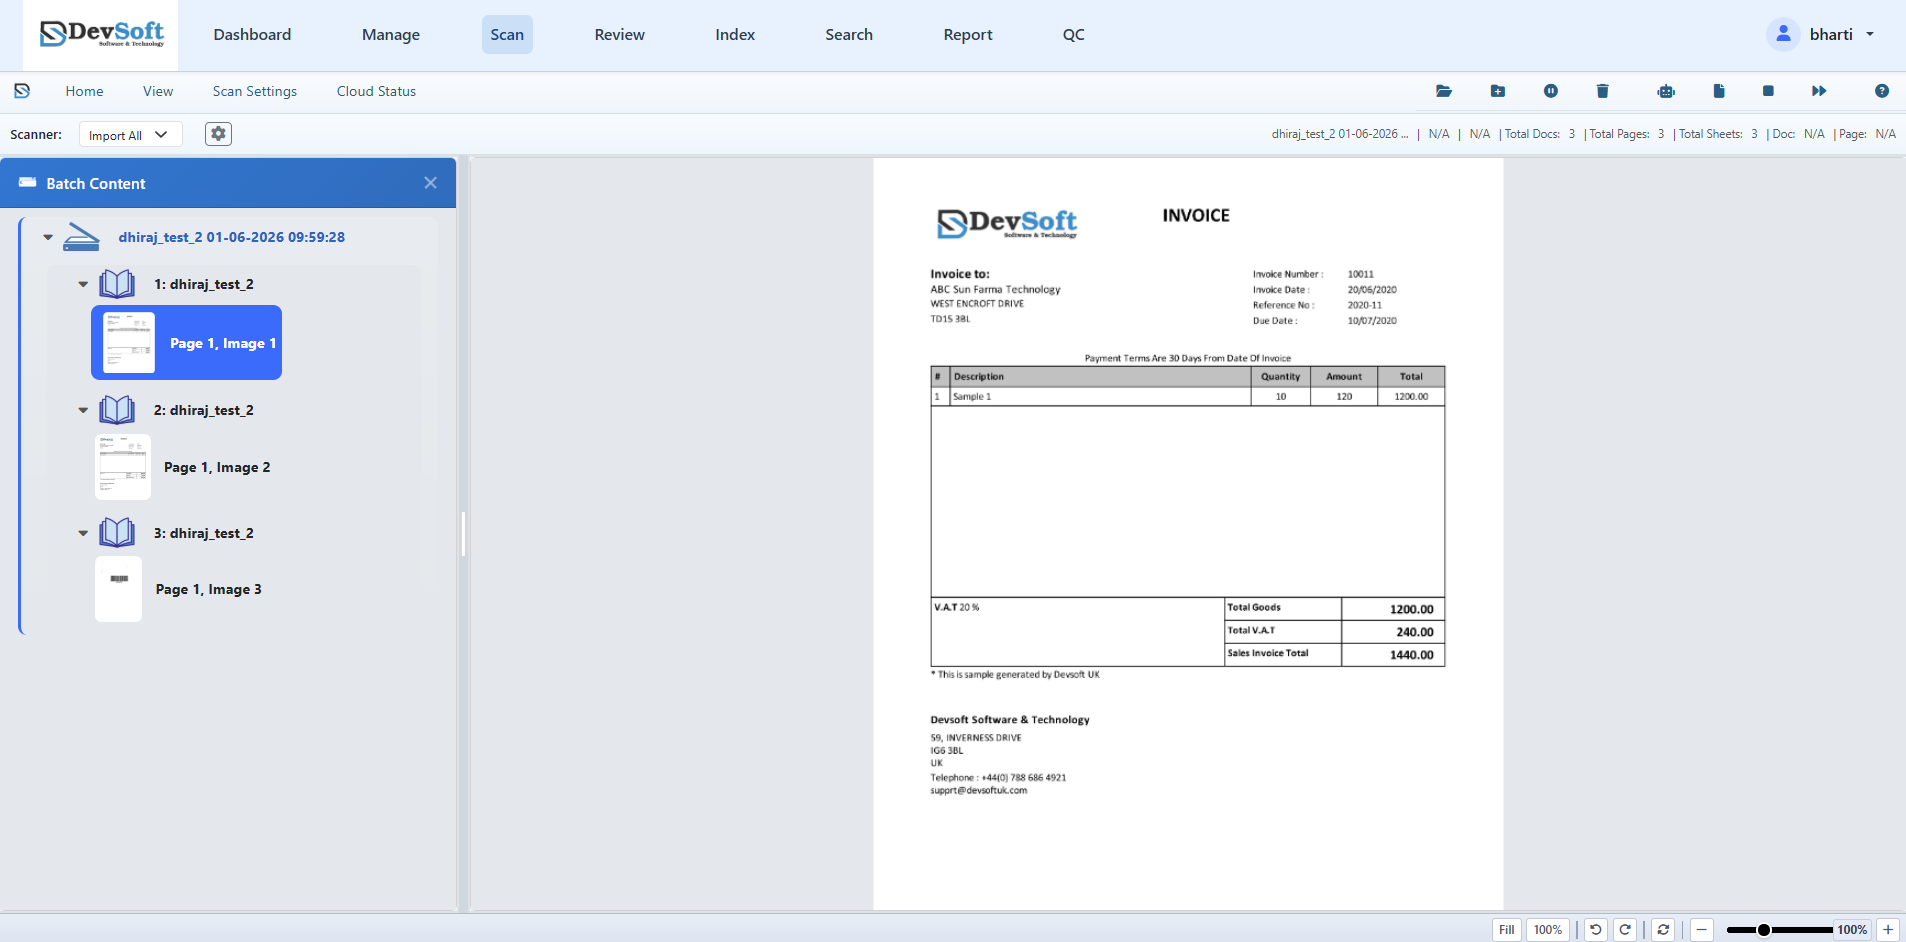
Web Scanning allows operators to capture paper documents directly into DocView Capture Web from a browser session. It provides a full-featured scanning workspace with ribbon controls, a batch tree, image preview, and configurable scan settings.
Before you scan
- Install the connector – the DocView Scanner Connector must be installed and running on the local workstation. It bridges the browser to the physical scanner hardware.
- Select a batch setup – this determines how incoming work will be organised, which modules the batch will pass through, and what document types are available.
- Check scanner connectivity – the Cloud Status ribbon tab shows whether the connector is online and the scanner is ready. Select your scanner from the dropdown list.
Workspace layout
Ribbon tabs
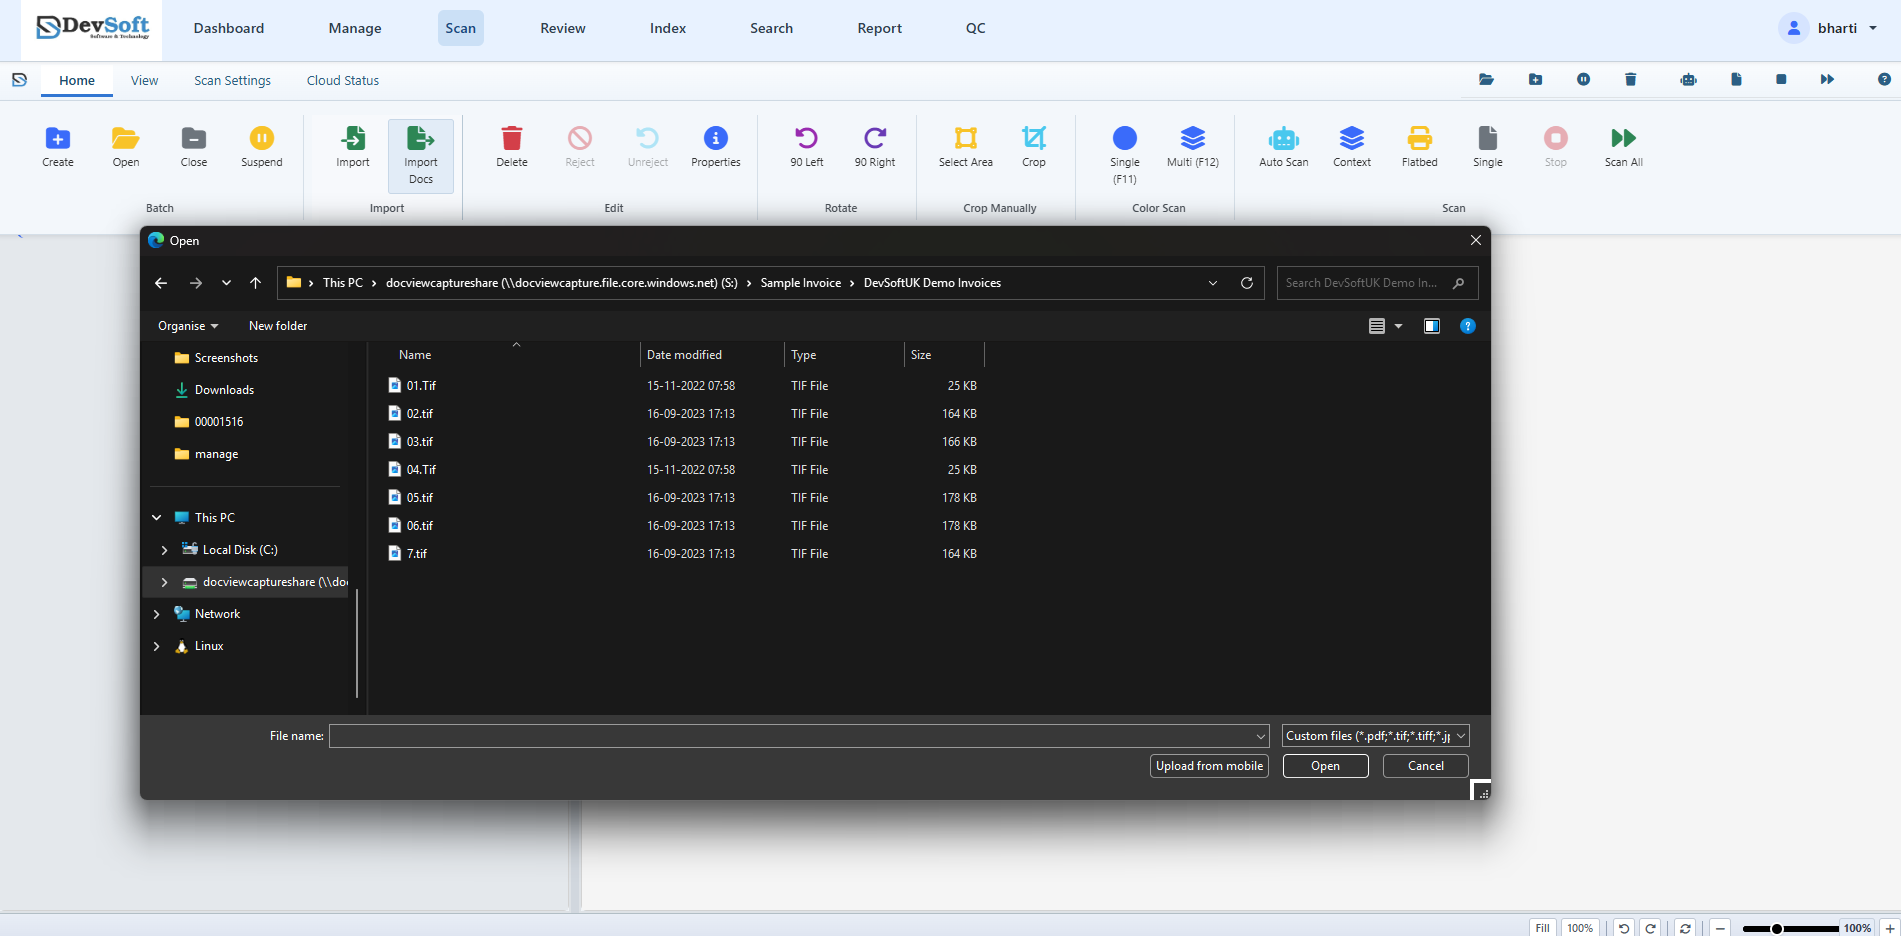
Home Tab
- Batch – Create, open, close, or suspend batches.
- Import – Import digital files (
.tif,.pdf,.jpg, etc.) directly into the current batch using Import or Import Docs buttons. - Edit – Delete selected nodes, reject or unreject pages, and view batch properties.
- Rotate – Rotate page images 90° Left or 90° Right.
- Crop Manually – Use Select Area and Crop buttons to manually trim areas of the page.
- Color Scan – Execute color scans using Single (F11) or Multi (F12) shortcuts.
- Scan – Control the scanner using Auto Scan, Context (Scan Context), Flatbed, Single, Stop, or Scan All.
View Tab
- Batch View – Toggle showing all items or only rejected items.
- Panels – Toggle the Batch Contents tree view, list views, and the status bar.
- Zoom – Access pre-defined zoom levels (50% to 200%), Fit Whole page, Page Width, Page Height, or Fit 100%.
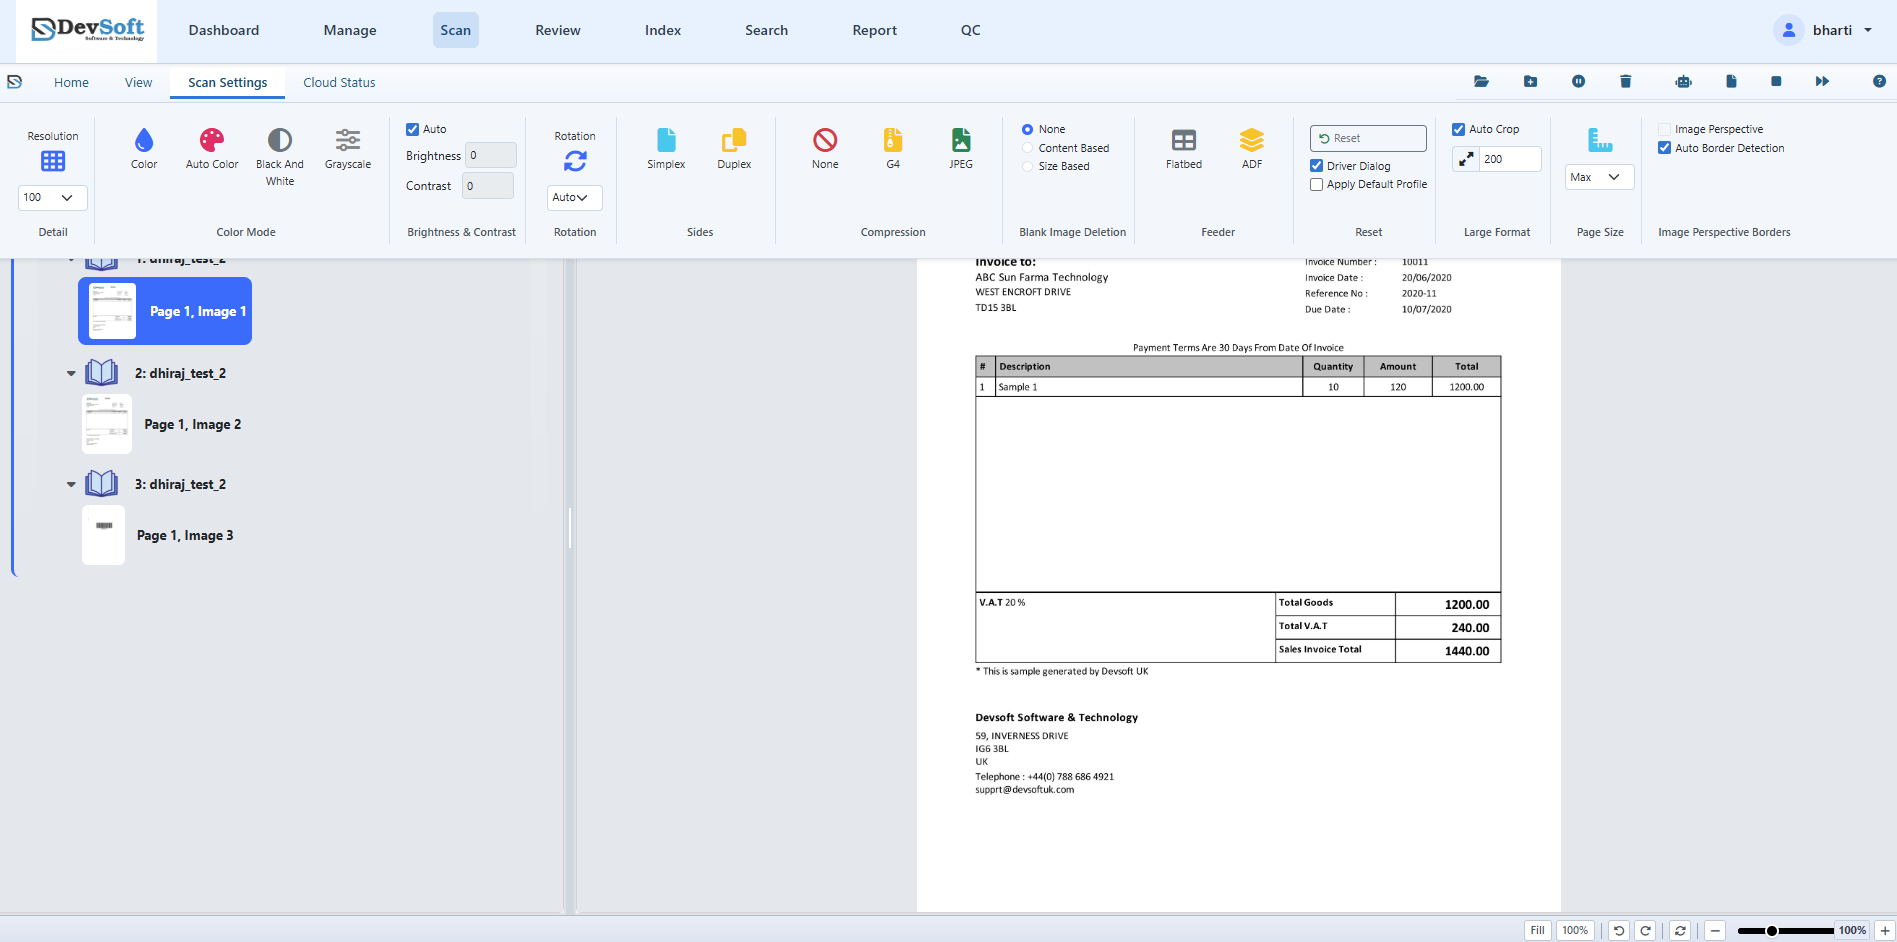
Scan Settings Tab
- Detail – Configure the scanner resolution.
- Color Mode – Choose between Color, Auto Color, Black And White, or Grayscale.
- Brightness & Contrast – Enable auto brightness or enter specific numeric values.
- Rotation – Select image rotation preferences (None, Auto, Auto Default 90/180/270, Rotate 90/180/270).
- Sides – Select Simplex or Duplex feeding.
- Compression – Choose the compression type (None, G4, JPEG).
- Blank Image Deletion – Set to None, Content Based, or Size Based.
- Feeder – Set the input tray to Flatbed or ADF (Automatic Document Feeder).
- Reset – Reset settings to defaults, toggle Driver Dialog display, or apply default profiles.
- Large Format – Enable Auto Crop or set Large Format Size limit.
- Page Size – Select from the standard sizes.
- Image Perspective Borders – Toggle perspective correction and Auto Border Detection.
Cloud Status Tab
- Azure Upload – Execute uploads of batch data directly to Azure cloud storage.
Batch tree (Left Panel)
The left panel shows the batch structure as a tree. Documents and pages are listed hierarchically so the operator can see exactly how the captured content is organised.
Image preview (Right Panel)
Displays the currently selected page image at full resolution. Use the zoom, pan, and rotate controls to inspect quality before closing or processing the batch.
Status bar
The status bar row displays scanner selection, a Scanner Properties button (gear icon) to configure device TWAIN settings, and running metadata/progress for the current batch (Total Docs, Total Pages, Total Sheets).
Supported Scan Settings
The web-based scanning client supports the following settings:
- Resolution Options:
100, 200, 300, 400, or 600 DPI. - Page Size Options:
Max, A0, A1, A2, A3, A4, A5, A6. - Sides (Feed Mode): Simplex (front only) or Duplex (front and back).
- Compression: None, G4 (Group 4 fax compression), or JPEG.
- Blank Image Deletion: Disabled (None), Content Based, or Size Based.