Workflow Setup
The Workflow Setup page is where administrators create, configure, and manage business process workflows. DocView Web uses a visual editor that lets you design complex approval chains, routing logic, and automated actions with a drag-and-drop interface.
Opening the Designer
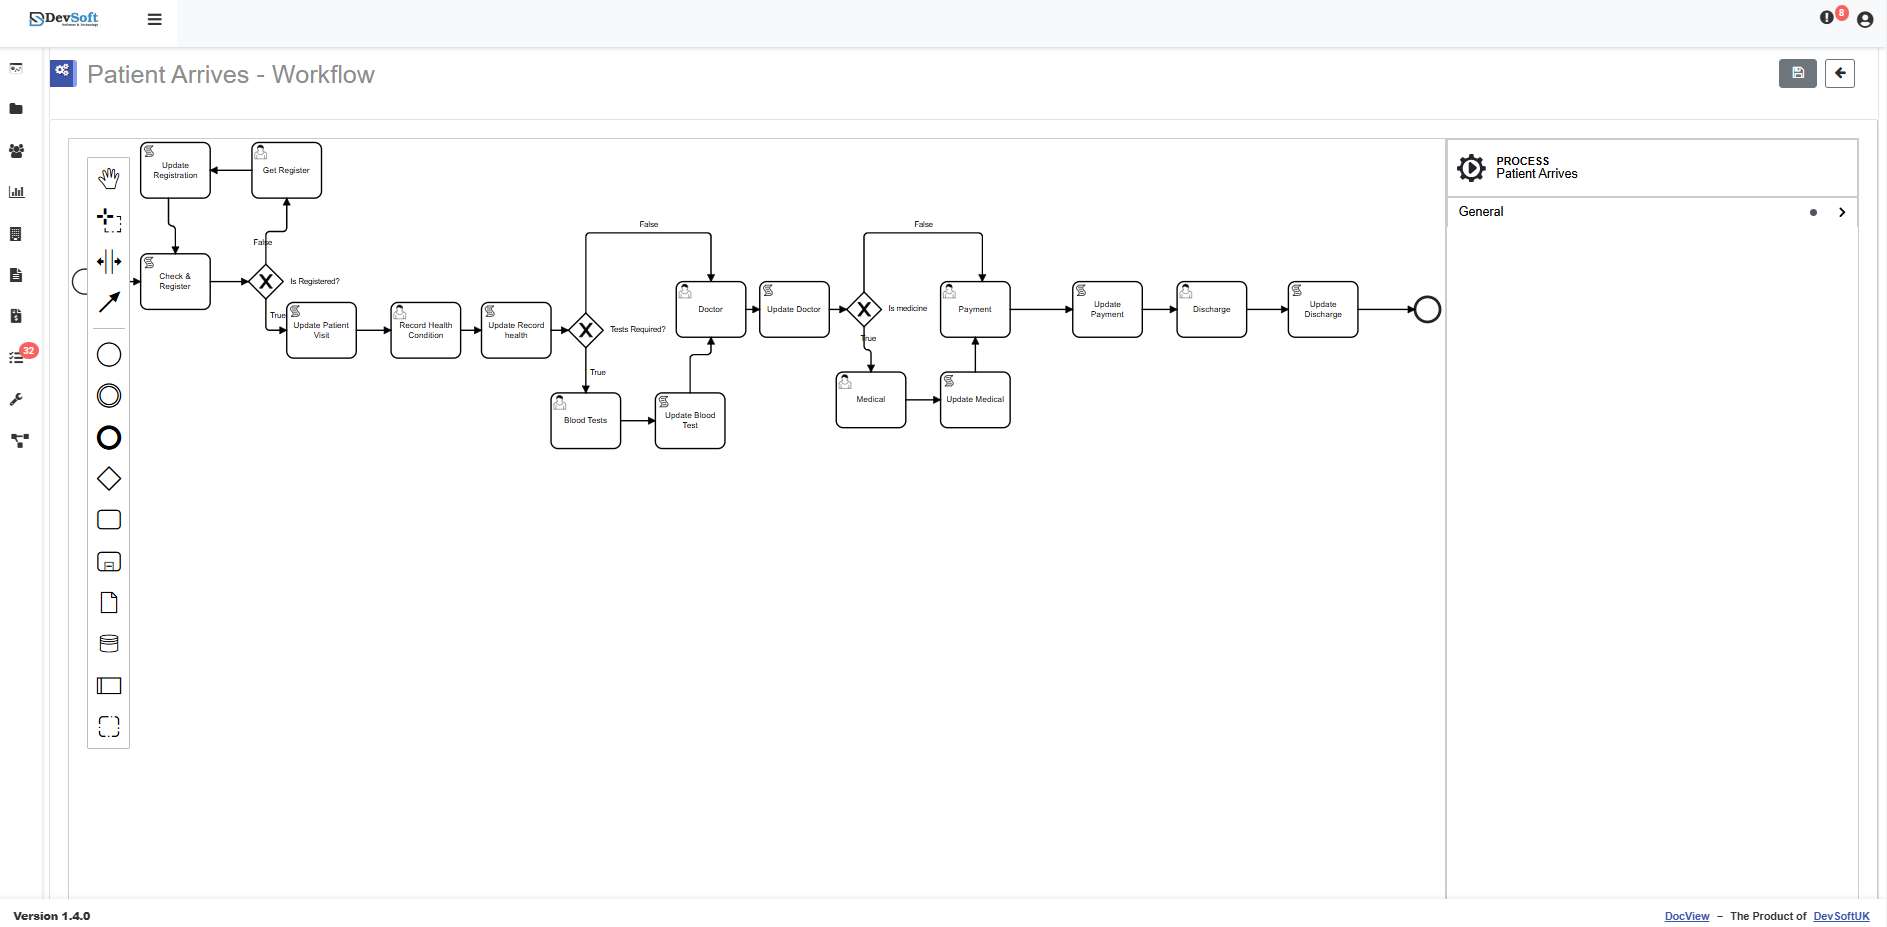
- Navigate to Workflow in the left sidebar.
- Click Workflow Setup (visible to administrators only).
- You will see a list of existing workflows. Click Create Workflow to start a new one, or click an existing workflow to edit it.
- The workflow canvas opens with a toolbar on the left and a properties panel on the right.
Building a Workflow
- Start Event – Every workflow begins with a start event (green circle). Drag it onto the canvas from the palette.
- Activities – Add task shapes to represent each step in the process (e.g. “Manager Review”, “Finance Approval”, “Send Notification”).
- Sequence Flows – Draw arrows between activities to define the order of execution.
- Gateways – Add decision points (exclusive gateways) to branch the workflow based on conditions (e.g. “If PO value > £5000, require director approval”).
- End Event – Every workflow must end with an end event (red circle).
Workflow Properties
Click any element on the canvas to configure its properties in the right panel:
- Name – A human-readable label for the step.
- Assignee – The user or role responsible for completing this step.
- Actions – The available actions at this step (Approve, Reject, Complete, or custom actions).
- Integrations – Connect to external systems such as email servers or other business applications.
Workflow Variables & Data Lookups
Workflows can use variables to pass data between steps. Variables can be created, edited, and deleted from the Variables section. They support text, numbers, dates, and yes/no options and can be referenced in conditions and email templates.
Data Lookups: You can now define custom Data Lookups (lists of options) with specific display texts and values. These lookups can be bound to workflow variables to automatically populate dropdown lists in forms with dynamic, centrally managed data.
Workflow Naming Configuration
To standardize how workflows are identified, administrators can configure dynamic naming formats. Under the Workflow Settings tab, you can define a naming convention using standard placeholders like the workflow name, current date, and time. This ensures every generated workflow instance has a clear, standardized, and easily identifiable title.
Workflow Forms
The Form Builder lets you design custom forms that are presented to users during workflow steps. Forms can include text fields, dropdowns, date pickers, checkboxes, and rich-text areas. Responses are stored as workflow data and can influence subsequent steps.
Publishing a Workflow
After designing the workflow, click Publish to make it active. Published workflows can be triggered automatically (e.g. when a document is uploaded to a specific type) or manually from a document record.
WARNING
Editing a published workflow creates a new version. Running instances continue using the version under which they were started.